Friday, September 12, 2014

CentOS 7 - xscreensaver

I really hate this Gnome interface - badly.  It requires so much clicky-clacky/mouse-moving work that I instantly feel like I'm in Microsoft Windows again.  I prefer a nice, simple Window Manager that is simply that - a window manager.

I have a laptop that I have installed CentOS 7 to - after completely forgetting with a desktop installation - that doesn't have a viable screen saver (unless I choose to go with that abomination called "Gnome").  See, I can't deal with Gnome.  I tried KDE for a week, and half of the time, I couldn't unlock the KDE/plasma screen because it never presented the unlock on it.  I realized that CentOS was not going to make a good desktop/laptop operating system unless I could get to a decent Window Manager and screen saver.

So, I did what every intelligent, awesome, amazing, and brilliant individual would do.  I went down the rabbit hole.  Seriously, I should have taken the blue pill and pretended that Gnome was just awesome - but I don't think I could get beyond comparing it to slicing my wrists and doing pushups in salt water with a hint of lemon juice in it.  I grabbed Xfce (nice - this one came in packages from the Fedora Project epel repository).  However, the EPEL Fedora Project repository still did not have xscreensaver.  That's a serious risk to me.  The last thing I wanted was someone coming by, finding the laptop unlocked, and me returning to find Justin Beiber as my wall paper.

So, I knew I had to compile xscreensaver from scratch.  I ran out and downloaded it from http://www.jwz.org/xscreensaver/download.html and extracted it.  I found a couple of missing packages (aside from the development packages I'd installed previously), and found those in yum :
    yum --enablerepo=base --enablerepo=updates --enablerepo=extras --enablerepo=epel --enablerepo=rpmforge install xorg-x11-server-devel.x86_64 libXt-devel libXpm-devel motif-devel
    
Then..., I tried to compile it :
    make distclean
    ./configure --with-motif
    make
    
I kept running into undefined functions for pthread_join and pthread_create, and thought I was missing a library - but I wasn't.  Down that rabbit hole, I realized I had to patch it.  I tracked down (from the error message) that it was trying to assemble the bsod screensaver and getting those functions, so I opened up the Makefile and started checking it to see how the -pthread was being passed.  After tracking it down, I created the following patch :
    diff -rupN xscreensaver-5.30-base/hacks/Makefile.in xscreensaver-5.30/hacks/Makefile.in
    --- xscreensaver-5.30-base/hacks/Makefile.in    2014-09-11 11:07:53.000000000 -0600
    +++ xscreensaver-5.30/hacks/Makefile.in 2014-09-12 09:48:05.017172709 -0600
    @@ -671,7 +671,7 @@ truchet:     truchet.o      $(HACK_OBJS) $(COL)
            $(CC_HACK) -o $@ $@.o   $(HACK_OBJS) $(COL) $(HACK_LIBS)
     
     bsod:          bsod.o          $(HACK_OBJS) $(GRAB) $(APPLE2) $(XPM)
    -       $(CC_HACK) -o $@ $@.o   $(HACK_OBJS) $(GRAB) $(APPLE2) $(XPM) $(XPM_LIBS)
    +       $(CC_HACK) -o $@ $@.o   $(HACK_OBJS) $(GRAB) $(APPLE2) $(XPM) $(XPM_LIBS) $(THRL)
     
     apple2:                apple2.o apple2-main.o  $(HACK_OBJS) $(ATV) $(GRAB) $(TEXT)
            $(CC_HACK) -o $@ $@.o   apple2-main.o $(HACK_OBJS) $(ATV) $(GRAB) $(TEXT) $(XPM_LIBS) $(TEXT_LIBS) $(THRL)
    
Simply put - the bsod compile instructions missed having the THRL (pthread library) environment variable passed to it.  That was the ONLY patching I had to do.  It still didn't compile because of the xscreensaver-demo until I symlinked the following Directory :

 cd /usr/include/
 ln -s gdk-pixbuf-2.0 gdk-pixbuf

Compiled just fine!


Wednesday, September 3, 2014

Paint Color Matching

I have good news and I have bad news.  First, with both door panels in, a good days worth of work could finish off the interior of the car.  With that in mind, it's time to start looking for a painter for the headlight units.

I called up some paint supply people, and got a recommendation - Larry at Vision Body & Paint, 11265 S 1300 W, South Jordan, UT (801-755-2084).  We talked for a little bit, and (since the paint was done with a gold pearl) now I have a good plan of action.

The color code I had last time was PPG Shimmering Shamrock, 908632 (UPDATE: I'm dyslexic, the code turned out to actually be 908362) 2-coat system.  Calling the supplier again (KC Auto Paint, 1600 S Redwood Road), and they said over the phone that it wasn't green - it was blue.  So now, I've got to run to the supplier with the part again, see if they can match it, grab a pint of stuff (they can mix the color for me), and run it over to the painter to let him try it out.  I think this one trip will cost me $300, but here we go!

UPDATE - I picked up a half pint of base color and a half pint of pearl, and delivered it to a new paint shop - we'll see how well he can match it.

Monday, September 1, 2014

'77 Door Panel with '78 Sport Mirrors and Remote

Wow.  The second door panel is now installed.  This was a bit different, since it wasn't designed for the bullet mirrors and the "remote" mechanism - I had to install it before the door panel was installed.  Here's what I did.

First, I had to mark where the remote connection would be coming through the door panel.  For this, I installed the door panel at the top, and swung it down to put a mark on the black plastic on the back of the door panel.  Then, using that mark, I drilled a vertical hole through the panel.  The problem was that the remote adapter goes through the panel at an angle.  I drilled a second hole through the panel at an angle.

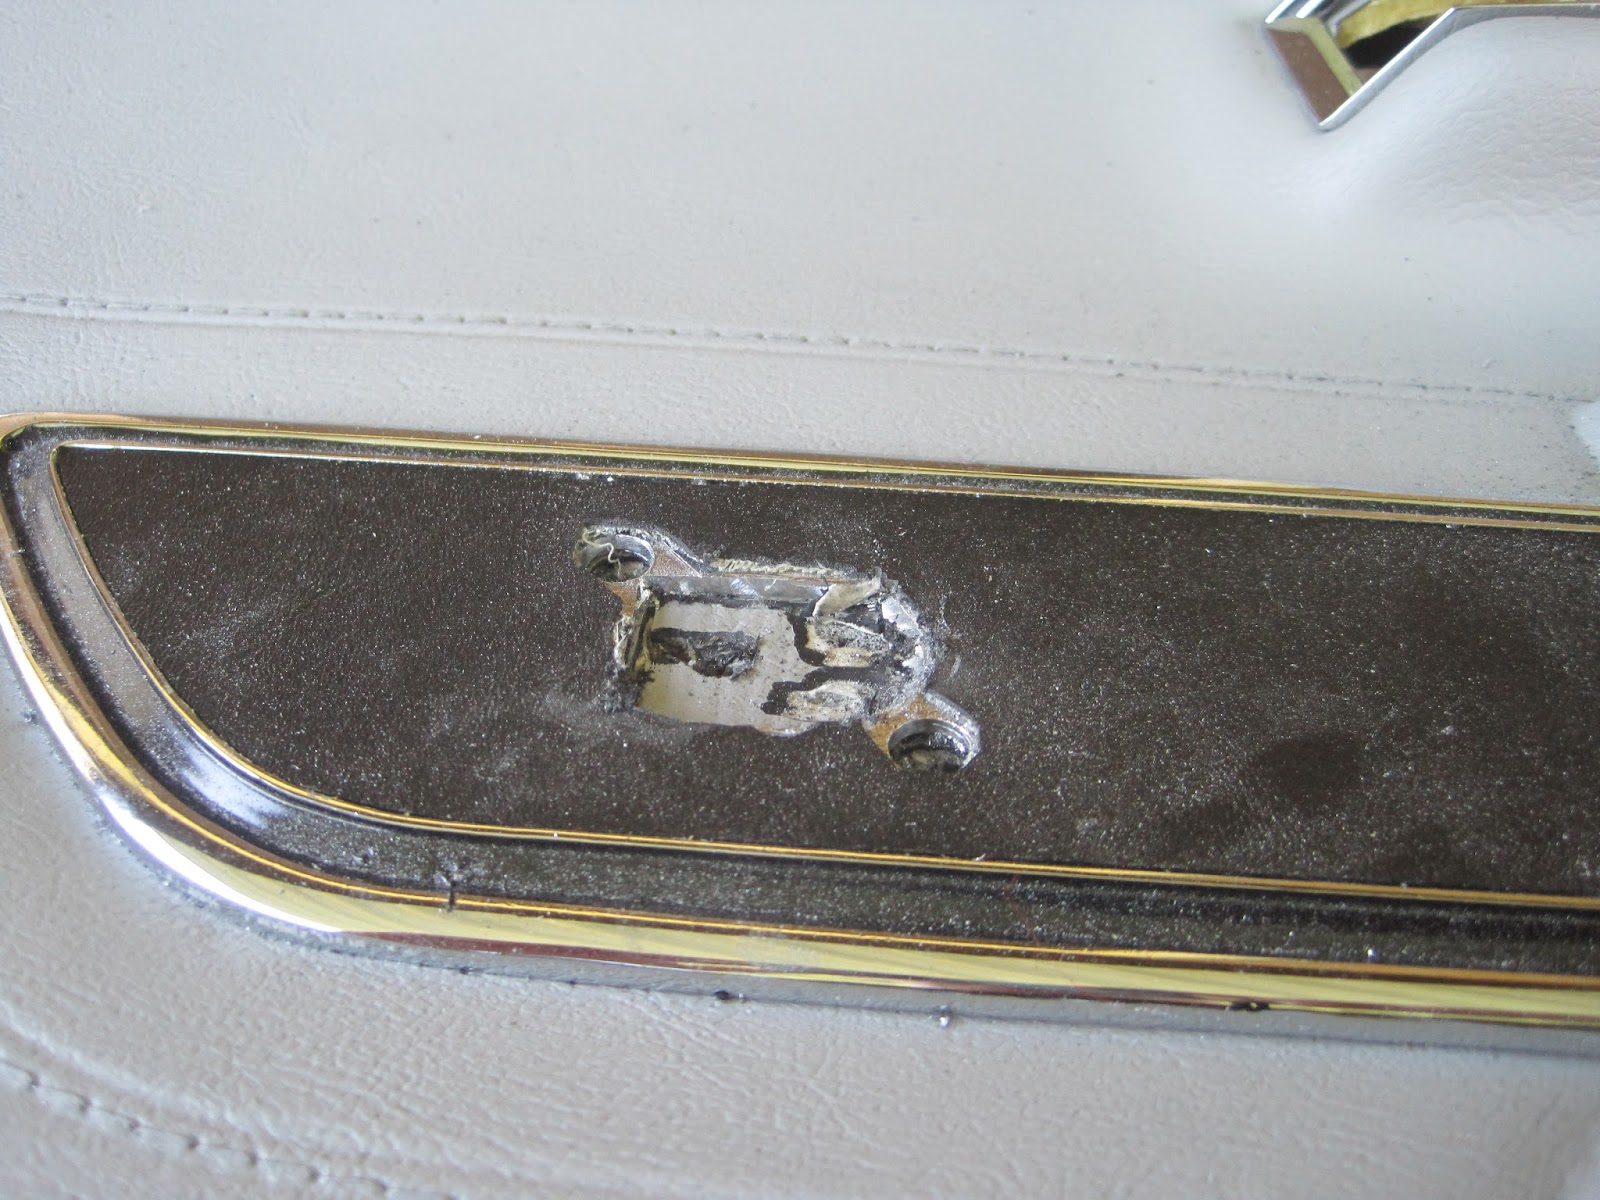
With the approximate location of where things had to be cut, I grabbed my Dremel, and (using the back side of the chrome trim for the remote as a template) started cutting the approximate location:


Once through the trim metal, I found that the "vinyl" for the door underneath.  I used the Dremel again to cut through that, and found black plastic underneath that, too.  Beneath that was the foam, and then the back side of the panel, which was black plastic.  Cutting it out :


I then used the Dremel again to cut around and expand the "square" cut that was a template, making it very much an oval (which is what the chrome trim piece looks like).  Once I was close, I placed the trim piece in position and used an awl through it to mark where the two holes to hold it in place would go.  Then, I drilled them out :


With the trim piece in place, I started to look like it really belonged there :


I had a few minutes to install the door panel :


Looks like it was made that way!