Tuesday, December 28, 2021

Old Keyless Chuck

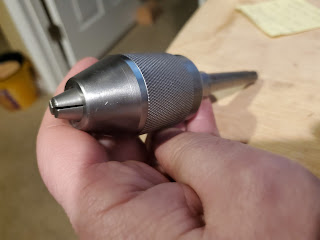
 I found an old, keyless chuck on eBay that I was willing to buy.  It was priced almost right (for $25, it should have at least worked).  It's a Craftsman keyless chuck from 1972, model 22562 (stamped into the back).  it's an integral shank Morse taper (MT1), and when threading on or off, the jaws didn't move.  I thought I'd better take it apart and see what the trouble was, since I'm better at taking things apart than I am at putting them back together.

Anyway, before I got it apart, I noticed that some pieces were not lined up when looking through the middle of it.  If I pulled the threaded part of the shank out, I could see light through it with a flashlight behind the chuck.  I knew it absolutely HAD to come apart.

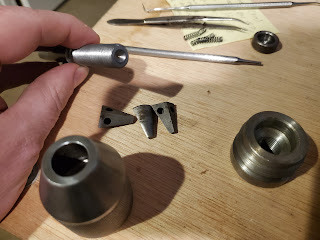
Some chucks split between the knurled surface on the body and the cone at the top. This one splits between the knurled section and the base (right at the parting line).  I had to use some locking wrenches to get it apart.  This part took me a while to figure out, since it didn't go the same way as other chucks described out there.  Once the body came apart, the whole thing came apart fairly quickly.

It was at this time that I noticed two divots - one in the threaded rod end (between my fingers in the above photo), and one in the piece that was out of place before I got to this point (the round thing in the top-right of the picture - the tweezers are pointing to this part).  If this was turned between centers, the slopes on these two divots would be different - they were about a 120-degree cone.  It didn't take a genius to realize that I was probably missing a ball bearing.  I went out to my stash, and grabbed one that would set in place and allow the two pieces to spin freely of each other.

Then I cleaned it.  It felt really tacky to me.  A good cleaning, and then I could piece it back together.

The re-assembly went rather quickly, and now I have an old Craftsman keyless drill chuck (circa 1972), MT1, to go with my Craftsman (well, Dunlap) wood lathe (circa 1942).


Looks good, has a slight hang up on retracting a chuck jaw, but it does function.  I might need to lightly oil the chuck body (NOT the jaws) to make sure it's good, but I'm happy.

Thursday, December 2, 2021

A Barrel For Monkeys

 A buddy of mine had a job for me.  He handed me a Glock 27 (.40 S&W), and asked me to replace some parts that have worn, and also give it a face lift.  After taking it apart, I sandblasted the slide, and purchased a second slide.  I did not want to make massive changes to his gun, so it was a bit of a challenge to find a slide that didn't have awkward cuts for red-dots or other things used in competition.  With that one in hand, I also sandblasted that one in preparation for Cerakote.

The difficult part here is that the frame is a slightly-greenish form of brown.  The Cerakote colors I had on hand were black, burnt bronze, and eastern front green.  Having worked as an artist for a year, and having taken a number of art classes, I took a chance on coloring.  I used 1/2 (30ml) volume of black, 25ml of burnt bronze, and 5ml of the forest green.  Mixing it up was fast, a quick spray, and into my toaster oven to cure for a couple of hours.


The color came out nearly perfect.  I can see a very slight difference in color, but it looks like an exact match.  The colored frame and the black slide of the former version pales in comparison, really.  Anyway, I had to purchase a striker channel liner removal tool, and that also functioned as an installer.

His barrel replacement was one of the bigger issues.  That was extremely painful to locate a replacement.  I finally found a longer barrel (about 0.8875" longer) with a built-in series of vent tubes (muzzle-brake of sorts) that was destined for competition.  Considering the guy uses this for a carry gun, I had to shorten the barrel.


Yeah, it definitely needs to be shortened.

I started putting the barrel into the 4-jaw chuck, but I struggled on concentricity.  It was about the third try at it when I realized that I did not trust it.  I could not indicate on the outside - because I don't know how concentric it was to the actual inside.

Based on that, I had to build a new "setup" tool.  I grabbed a piece of stainless steel about 20" long, 9/16" diameter, and faced the end and center-drilled it (I also put a concentric end on it so I could double check diameters over the full length.  I pulled it out to where the other end was barely held by the collet, with the far end held via the live center at the tailstock.

Then I could turn a 3" length down to 0.391" (the gauge pin gave me this diameter specific for these barrels, and again, I bought two in case I hosed it up).  I put a bit of a relief cut on the end so that I didn't have a rounded area locking onto the barrel, and then, slightly away from the barrel and while still held in place by the collet, I turned a small, shallow groove that I could use as an indicator spot.  I had to do a test fit with the barrel.


The next phase was to re-install the first barrel into the 4-jaw chuck with the centering rod in place to keep it concentric.


Once centered up, I could begin the cut, face the barrel, and then put a crown on it.  Here is the gun with the cut-off barrel section, ready to be delivered!

This was my first, and likely my only barrel job.  I didn't like doing this too much, and have no need to do anything like this for myself.  But, I can convert that long shaft into a new dead center for the headstock, so it's not a total loss for me.

Sunday, September 26, 2021

Stool Sample

Crappy title. It is all accurate, it just doesn't end up where you think it does.  I know, and I'm sorry for misleading you.  I don't do click-bait very well.

Anyway, we're gathered here together today to celebrate the fact that I have a wood shop now.  While it's true that it has to be mobile because my wood work is done on the back porch, I actually have all of the tools - drill presses, band saw (with re-sawing blades), belt sander, jointer (or joiner, if you prefer), mitre saw, table saw, and a planer.

I need to build a table for family.  But, I absolutely have to know that what I have will do the job, and that requires a first quick-and-dirty project.  What do I have available to use?  Only 2x4's (the ones that are actually 1.5"x3.5") are available.  So, I thought I should turn a 2x4 into a little folding stool.

I had a small gardening stool (or chair) I'd made in wood shop back in junior high school.  The thickest piece of wood was 3/4" so I thought it would be an excellent project to make out of 2x4's.  It would require re-sawing the boards to get close to the 3/4" thickness, a table saw to trim seat slats off of boards, a jointer to properly square the boards up, and a mitre saw for the chair feet.  I grabbed it, and slapped together dimensions followed by a "cut list".

Looking at the list of stuff, I needed :

  • 3/4"x2"x15" (four of these) for legs
  • 3/4"x3"x11" (two of these) for the seat frame
  • 1/4"x1.5"x11" (7-10 of these) for seat slats
  • 3/4" dowels

I first ran the 2x4's through the table saw.  I needed two boards that were 3"x3/4"x11" (they are the sides of the actual seat).  These are the widest of the parts, and I needed two of them.

While I was at it, I ran another section of the 2x4 through the table saw at the same position to rip another strip the same thickness off that came from the piece for the 3" one.  On that board, I ripped it a second time, repeating the ripping while getting a little closer to 2" in dimensions for the chair legs.  Each of those thin strips that came off was destined to become part of the seat slats.

With the board widths close, I took the boards to the band saw and re-sawed the boards to about 7/8".  This allowed me to generate even more material that could be planed down for seat slats.  I finally had my boards close to dimensions (except for lengths on the legs).  Here are the three sections of 2x4's and what they were trimmed to.

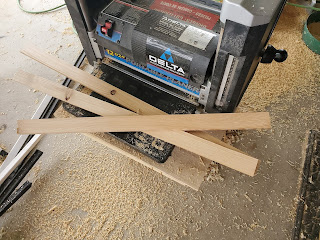
I needed the thickness of the boards to be dead on, so next was to run them all through the planer.  I did start with the legs, slowly bringing them down to the 3/4" that I needed, and then turned my attention to the thin strips for seat slats.  They were about 3/8" thick, so it didn't take a lot of time to get them down to the right thickness.  3/8" thick would have actually been fine for slat thickness, but I shot for 1/4".

I ran them through the joiner to square them up (this isn't really necessary), but it gave me the dimensional lumber I was in need of - 2"x3/4" and 3"x3/4".

The next task is to mark out the other dimensions required (the lengths).  I sliced them off at the miter saw starting with the seat slats, and moving to the seat frame.  The legs needed a mitered cut at the bottom, so I did that, and then made sure all of the legs were the right length.

This little stool includes a curved frame.  This is because I don't know anyone with a flat butt, so the frame ought to be the same.

Next up was a little seat frame marking, and leg marking.  I need two holes in each leg (one for a pivot and one for an anchor), and two holes in the seat frame.  I marked all of the locations according to the dimensions I'd checked from the original.  I needed to put in some curves on the seat frames (because no one I know has a flat butt).  In the middle, I marked in 3/4" from one side (the top side), and then set the board onto the table saw.  Using string to get the radius (it was tied to the table saw fence), I moved the board until I could get close to the middle 3/4" mark and also the topside's corners, forming an arc.

Then I just used that to mark about every inch, and then connect the dots.  It's not a perfect curve, but it was close enough.  I'd only marked one side of the seat frame - you'll know why in a minute.

With everything marked, it was off to the drill press to punch out the legs and seat frames.  While there, I used a hole saw to make four small circles about 3/4" thick and 2" in diameter with a 3/4" bore.  These are "retainers".  I brought the parts back to the table saw, and used the jig saw to cut out the curve on the one seat frame.  

Next, I grabbed a dowel, and used that to line up the two seat frames.  Note that I had marked one hole on each of those seat frames about a 45 degree angle.  This is to be cut out, and both of these seat frames needed that cut out on the same side.  Then, I could draw the miserable attempt at a curved line onto the other seat frame so that the two frame tops can be parallel.

With the final cuts marked, I grabbed the jig saw again, and cut out both the arc on top of the other seat frame, plus notched those two holes.  I now had my entire cut list complete, and I was ready for assembly.

The air compressor was fired up, and I grabbed the brad nailer and tacked it all together.  Yes, there is no glue on this chair - don't let the picture above with the wood glue in the corner fool you.  Some joints are not tacked, and some are.  It allows anchoring at specific points and mobility at others.

And finally, compared to it's template (the one from junior high school) :


It looks like I am ready to try the next project, the table!

Saturday, September 25, 2021

Setting Up Apache for Federated Identity

I was loading my environmental data up on a web server through Grafana.  I'd been running LDAP-based authentication for years, and wanted to be able to shut that service down because I was growing weary of updating SSL certificates.  I had Grafana running on it's own TCP port inside, but I desired to expose it (while protecting the data).  I finally broke down and did it.

I started out with two "tutorials" :

Both of these were lacking in information.  For example, there are no instructions on setting up the Google API, and there was a configuration option of "OIDCCryptoPassphrase" that was a variable and no one explained what it needed to be set to.  But, I wanted to get it done.

First, I went through Google.  I'd not set up google cloud for my domain before, so this was new.  First, log in to the https://console.cloud.google.com/apis/dashboard?pli=1 (it's the cloud platform).  Once in there, if you don't have a project already, create one.  This is done using the drop down at the top :

Click on "New Project" in the upper right hand corner :

Now, you can create a credential.  Click on "Credentials" on the left, and then "Create Credential" at the top :


Follow the set up guide.  The type will be what you need, in my case, I was doing Apache's HTTPd server, so I went with "Web Application".  The redirect URI setting must match what you use for your OAuth configuration (in the configuration file, actually).  Make sure you have your domains listed, etc.


At this point, copy the ID as well as the client secret.  These need to go into your configuration file for Apache's HTTPd.

You might need to create an "OAuth Consent Screen", too.  Those three configurations in Google are all you need.

Load up your editor you use to change the HTTPd configuration.  The basic lines you are going to need are :

    OIDCProviderMetadataURL https://accounts.google.com/.well-known/openid-configuration
    OIDCClientID CLIENT_ID_FROM_CONFIGURATION
    OIDCClientSecret CLIENT_SECRET_FROM_CONFIGURATION

    # OIDCRedirectURI is a vanity URL, and should not point to any actual content
    OIDCRedirectURI http://hostname.example.com/grafana/redirect_uri
    OIDCCryptoPassphrase PERSONALLY_CHOSEN_PASSPHRASE
    OIDCScope "openid email profile"
    OIDCRemoteUserClaim email

    <Location /grafana/>
        TemplateEnabled off
        AuthType openid-connect
        <RequireAny>
            # not just anyone signed in from google
            # Require valid-user

            # network
            Require ip 10.0.0.

            # signed in with domain
            Require claim hd:silverhawk.net

            # or, signed in with domain (e-mail fall through)
            Require claim "email~^(.*)@silverhawk.net$"

            # or Someone External
            Require claim "email~^username@gmail.com$"
        </RequireAny>

        ProxyPass http://localhost:3000/
        ProxyPassReverse http://localhost:3000/
        Order allow,deny
        Allow from all

        # grafana requires the username to be in a header
        RewriteEngine On
        RewriteRule .* - [E=PROXY_USER:%{LA-U:REMOTE_USER},NS]
        RequestHeader set X-WEBAUTH-USER "%{PROXY_USER}e"
    </Location>

The OIDCClientID and the OIDCClientSecret configuration items are where you stuff the respective items from your OAuth configuration we copied above.  The OIDCCryptoPassphrase is where I was getting lost - this is going to be something you choose, and is specific to the cluster (e.g. so that the cluster can keep state if you hit other servers).

I used a RequireAny to set up multiple options - so, if you are on the local network and sign in to google, you'll get in.  If your primary google address is a silverhawk.net domain, you can get in.  If your e-mail address is username@gmail.com, you can get in.

The rewrite directives are there specifically for Grafana so that Grafana can see the remote_user as the e-mail of the individual who just authenticated.  In your grafana.ini, locate your root_url, and make sure we've added the URI piece we are proxying, e.g. :

    root_url = %(protocol)s://%(domain)s:%(http_port)s/grafana/

Next, locate your "[users]" section, and set the following :

    allow_sign_up = false
    auto_assign_org = true

Next, locate the auth.proxy in your Grafana configuration.  Since we are rolling through HTTPd and it will be doing the authentication, we can let Grafana accept whatever HTTPd feeds to us.

    [auth.proxy]
    enabled = true
    header_name = X-WEBAUTH-USER
    header_property = username
    auto_sign_up = true

The header name should match what was in our rewrite rule, and the header property is the username that is going to get set up.  auto_sign_up needs to be set to true so that we can create accounts on the fly.

Now, restart any processes and give it a test!

Thursday, September 9, 2021

Spotting a Scam

 I received an e-mail (actually, the second one to a different address triggered this, but I'm hitting the first one).  Obviously, it's a scam.  Let's take a look :

First, an e-mail address takes the form of username@domain.  In this one, the "From" address doesn't match who they are pretending to be (they have pconfermations@gmail.com with a name of "Produts Confermations").  The @ portion (the domain) is "gmail.com".  No self-respecting business will send from a domain that is not owned by the business.  That would mean that McAfee e-mails would come from @mcafee.com, not @gmail.com .  The username doesn't even spell things right.  We know from the start that this isn't from McAfee, and whomever it is can't spell to save their life.

Second, the "subject" of the e-mail has awkward characters in it.  Beware of crap that has emoji's or other things in them - they are definitely unofficial.  Underscores in a subject are nearly unheard of with real businesses.

Next, into the body of the message, we find mis-spellings and bad grammar throughout.  More underscores in "Dear-Values-Customer"?  Yes, please.  "Antivirues"?  Okay, enough on that.  Let's just check and see if we can find the origin.  Open the message source (this will depend on your mail client, you might need to open a browser window and search the Internet for "view email source" and the name of your client to find out how).

At the top of an e-mail source are what can be referred to as "headers".  There will be no empty lines in this area.  These headers are keys and values, separated by a colon, the key on the left.  When an e-mail is received by a server, that server is supposed to tack onto the leading front any source information such as "Received".  This means that if we find each of the "Received" headers as we scroll down, we are actually taking a look at the messages history and going back in time.  We want to know the origin, so lets scroll to the bottom of the headers, and then work our way back to the top.

You'll see all of the "Subject:" and "Bcc:" headers - these are what your mail client displays when you open a message.  Shortly above this is our first "Received:" header.

Received: from mail-sor-f41.google.com (mail-sor-f41.google.com. [209.85.220.41])
        by mx.google.com with SMTPS id j5sor2873717lfe.26.2021.08.29.18.18.32
        for <email@gmail.com>
        (Google Transport Security);
        Sun, 29 Aug 2021 18:18:33 -0700 (PDT)

What I am interested in is anything that is four numbers separated by dots (no spaces, and not more than four numbers).  Here, that is "209.85.220.41", and it's called an IP Address.

When you are doing this, if the IP addresses start with 192.168., or 172.16., or 10.0, or 127., these are called "private networks" - though they can give us an idea of what the networks are built like, they won't help us, so if your first Received: header contains an address like that, simply move to the next one.

In our case, the IP address is not an internal, or private network.  So, open your web browser and do an Internet search for that.  (If you have Linux, you can also simply run a "whois 209.85.220.41" and get results).

Well, that sucks.  That address is a giggle address (spelling is intentional).  It's one of the gmail.com addresses.  I know, we could have looked at the domain name for it in the "Received" header, but I wanted to go through the exercise.  Google USED to show the source for the e-mail, even if it was done via gmail.com's website and not an e-mail client.  Just for kicks and giggles, scan all of them.

So, what CAN we do?  Actually, not much with this one.  Let's look at the second one.

Bugger.  It's also from a gmail account.  Still, the spelling of the name is atrocious, the spelling and use of symbols and underscores in the subject is a fast red-flag to know this is not official.  In the body, we have the usual grammar errors, and capitalization issues that alert us that the sender is not a standard english speaker.  Remember, a big business will have additional people proof-reading their e-mails and templates.

Then, there is the killer.  They couldn't even spell the company name right that they were trying too poof.  They had "MAcfee" instead of "McAfee".  Unfortunately, this one also had a gmail IP address :

Received: from mail-sor-f65.google.com (mail-sor-f65.google.com. [209.85.220.65])
        by mx.google.com with SMTPS id h7sor653174ljc.46.2021.09.09.03.18.39
        for <email@gmail.com>
        (Google Transport Security);
        Thu, 09 Sep 2021 03:18:39 -0700 (PDT)

So, like the detectives when all of the toilets were stolen from Scotland Yard, we have nothing to go on.

Still, on a positive note, they left two phone numbers.

1  (747) 600-1278 
+1 640-900-2247

If you Internet-search those numbers, you'll see that they have a scam reputation.  Still, I am tempted to call them just to see.

Friday, July 30, 2021

Building Another Tool Frame

With the latest wood shop tool acquisition (and preparing to build a table), and without a large shop I can use for either wood work or metal work, I have to have mobile tools that I can throw onto a shelf when not in use.

For this tool stand, I'd usually make a few cuts on the legs to bend an angle so I can get a good footprint (stable stance - like the wood lathe stand, the heavy 10 stand, or my mobile mini-mill stand).  This time, I opted to try to simply bend the metal, but that required making a bending die.  I had made the bending tool a few years back, but I can't bolt that to anything stable enough to use it, so I'll opt to use the hydraulic press.  It means I need a jig.  I cut the steel for the stand (I'm using 3/4" square tubing that is 1/8" thick, so it should be solid enough for any tool I throw at it.

After setting up for the bend, I went to make the actual bending die for the press.  As I was turning it on the lathe, the countershaft bearing went out.

This forced me to put everything on hold while waiting for new bearings.  Once I had the lathe up and running, I finished turning the die.  I only cut the groove 1/2" because the outside curve probably won't buckle as much (not compressing that one).  The bending die was then slapped into the bandsaw and sliced in half.


With the bending dies, I now had the tools I needed to progress (yeah, the lathe to make the tool to make the legs for the tool stand so I can use a tool - hmmmmph!).  This nested tool loop is expensive.  Anyway, back to the legs.


I loaded the first leg up in the press, gave it 12 strokes, and thought, "that looks just about right".  I ripped through the other three, and found that three of the four were bent slightly more.  So, I tweaked the first one (I probably missed and did a half count stroke that was preloading on the other three that I didn't do on the first.  It was half way through these legs (I had two done) that I had yet another thought - I should have used lubrication between the die and the leg.  I had resorted to just heating up the die and smacking it with a hammer to separate the two.  You can see the first one is not bent as much in the following picture :


I ended up with a 16 degree bend in these feet, without a lot of wear and tear on the bending die (and I have two).


Now, it was time to lay it all out.

Obviously, that's not the final shape, but it let me know where to start welding first.  I started on the long sides.  The 16 degree bends I wanted vertical, so a little math, and I could stack a few blocks together in order to establish angles that I wanted for everything.

It was a repeated process of weld-this, fail-to-get-penetration, cuss, clean, re-weld, un-tangle-mig-wire-jam, good-weld.  I think my wife laughed at me - a lot.  Anyway, once it was welded up (no stack of dimes, here - I go for loose dimes in a change drawer), I welded some nuts into the feet so I can put some bolts in, or thread in rollers for moving the tools around.  I didn't want to do anything fancy.  P.S., don't use zinc-plated bolts when welding if you have other options - you'll end up with headaches and nose bleeds from inhaling airborne zinc.

When you see the next picture, you might wonder why I didn't add stretchers on the short sides at the bottom.  This stand was specifically designed to slide over the unused Chevy 350 corvette motor sitting to the side to take up no more space than I am already taking up.  The higher-up stretches were more painful to do, but it should still provide enough operational strength to be satisfactory.  A little grinding and paint is all it takes to make a welder look like what he ain't.

I used a rust-oleum oil-based paint for this one - "hammered bronze".  I had some left over from the Heavy 10 stand (I'd have used the aluminum silver, but I didn't want to dig through the stack of paint cans buried behind my old 9" junior lathe parts pile).

I let the paint dry, and then ran a tap through those welded nuts just to make sure all was well on them (3/8"-16).  Then, I put castors on the bottom, and if I need to, I can replace those with bolts and I instantly have leveling feet.

I used some plywood I had laying around that wasn't long enough, and I glued them together for a top.  It was 3/4" ply, so I ended up with 1.5" of table top.  I installed the counter shaft and the motor mounts, and drilled through the top with a hole saw for the belts to pass through.  As each tool is mounted to this table, I will probably have to drill for each belt, and also install pulleys to the countershaft for the specific tools.  At this point, I have my first functional jointer:


It wasn't in it's final place, though.  I wanted to install multiple tools and have the work-height of each one be at the same height.  So, off I set to use the tool to make the wooden short stands that fit on top.  I don't care how "pretty" they are, I just need them functional.  The jointer stand needed a gap on the one side for the pulley, and it's weight sites squarely on the ends (it has feet), so I designed it in a way that it is easily done.  (This is the bottom side of the short stand.)

The planer was done next, and it needed feet to match the body, but added surface on the outboard so that it could cover in and out feeds, plus have an out feed table bolted up for longer pieces of work.  Again, this is the bottom side of the short stand that will sit on top of the tool stand.

Then I set to work on the table saw.  This one is not complete, as it will require an added horizontal set up because it has no way to drive the pulley from underneath.

I still need short stands for the mitre and the scroll saws.

I need new belting for the 3/8" pulley, and one counter shaft for the table saw, and I should be able to bolt things together and use individual tools as needed.

Now I can start working on the table.