Sunday, September 26, 2021

Stool Sample

Crappy title. It is all accurate, it just doesn't end up where you think it does.  I know, and I'm sorry for misleading you.  I don't do click-bait very well.

Anyway, we're gathered here together today to celebrate the fact that I have a wood shop now.  While it's true that it has to be mobile because my wood work is done on the back porch, I actually have all of the tools - drill presses, band saw (with re-sawing blades), belt sander, jointer (or joiner, if you prefer), mitre saw, table saw, and a planer.

I need to build a table for family.  But, I absolutely have to know that what I have will do the job, and that requires a first quick-and-dirty project.  What do I have available to use?  Only 2x4's (the ones that are actually 1.5"x3.5") are available.  So, I thought I should turn a 2x4 into a little folding stool.

I had a small gardening stool (or chair) I'd made in wood shop back in junior high school.  The thickest piece of wood was 3/4" so I thought it would be an excellent project to make out of 2x4's.  It would require re-sawing the boards to get close to the 3/4" thickness, a table saw to trim seat slats off of boards, a jointer to properly square the boards up, and a mitre saw for the chair feet.  I grabbed it, and slapped together dimensions followed by a "cut list".

Looking at the list of stuff, I needed :

  • 3/4"x2"x15" (four of these) for legs
  • 3/4"x3"x11" (two of these) for the seat frame
  • 1/4"x1.5"x11" (7-10 of these) for seat slats
  • 3/4" dowels

I first ran the 2x4's through the table saw.  I needed two boards that were 3"x3/4"x11" (they are the sides of the actual seat).  These are the widest of the parts, and I needed two of them.

While I was at it, I ran another section of the 2x4 through the table saw at the same position to rip another strip the same thickness off that came from the piece for the 3" one.  On that board, I ripped it a second time, repeating the ripping while getting a little closer to 2" in dimensions for the chair legs.  Each of those thin strips that came off was destined to become part of the seat slats.

With the board widths close, I took the boards to the band saw and re-sawed the boards to about 7/8".  This allowed me to generate even more material that could be planed down for seat slats.  I finally had my boards close to dimensions (except for lengths on the legs).  Here are the three sections of 2x4's and what they were trimmed to.

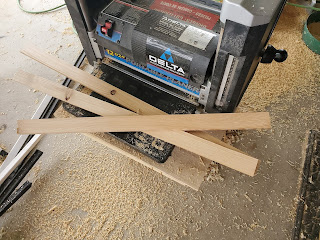
I needed the thickness of the boards to be dead on, so next was to run them all through the planer.  I did start with the legs, slowly bringing them down to the 3/4" that I needed, and then turned my attention to the thin strips for seat slats.  They were about 3/8" thick, so it didn't take a lot of time to get them down to the right thickness.  3/8" thick would have actually been fine for slat thickness, but I shot for 1/4".

I ran them through the joiner to square them up (this isn't really necessary), but it gave me the dimensional lumber I was in need of - 2"x3/4" and 3"x3/4".

The next task is to mark out the other dimensions required (the lengths).  I sliced them off at the miter saw starting with the seat slats, and moving to the seat frame.  The legs needed a mitered cut at the bottom, so I did that, and then made sure all of the legs were the right length.

This little stool includes a curved frame.  This is because I don't know anyone with a flat butt, so the frame ought to be the same.

Next up was a little seat frame marking, and leg marking.  I need two holes in each leg (one for a pivot and one for an anchor), and two holes in the seat frame.  I marked all of the locations according to the dimensions I'd checked from the original.  I needed to put in some curves on the seat frames (because no one I know has a flat butt).  In the middle, I marked in 3/4" from one side (the top side), and then set the board onto the table saw.  Using string to get the radius (it was tied to the table saw fence), I moved the board until I could get close to the middle 3/4" mark and also the topside's corners, forming an arc.

Then I just used that to mark about every inch, and then connect the dots.  It's not a perfect curve, but it was close enough.  I'd only marked one side of the seat frame - you'll know why in a minute.

With everything marked, it was off to the drill press to punch out the legs and seat frames.  While there, I used a hole saw to make four small circles about 3/4" thick and 2" in diameter with a 3/4" bore.  These are "retainers".  I brought the parts back to the table saw, and used the jig saw to cut out the curve on the one seat frame.  

Next, I grabbed a dowel, and used that to line up the two seat frames.  Note that I had marked one hole on each of those seat frames about a 45 degree angle.  This is to be cut out, and both of these seat frames needed that cut out on the same side.  Then, I could draw the miserable attempt at a curved line onto the other seat frame so that the two frame tops can be parallel.

With the final cuts marked, I grabbed the jig saw again, and cut out both the arc on top of the other seat frame, plus notched those two holes.  I now had my entire cut list complete, and I was ready for assembly.

The air compressor was fired up, and I grabbed the brad nailer and tacked it all together.  Yes, there is no glue on this chair - don't let the picture above with the wood glue in the corner fool you.  Some joints are not tacked, and some are.  It allows anchoring at specific points and mobility at others.

And finally, compared to it's template (the one from junior high school) :


It looks like I am ready to try the next project, the table!

Saturday, September 25, 2021

Setting Up Apache for Federated Identity

I was loading my environmental data up on a web server through Grafana.  I'd been running LDAP-based authentication for years, and wanted to be able to shut that service down because I was growing weary of updating SSL certificates.  I had Grafana running on it's own TCP port inside, but I desired to expose it (while protecting the data).  I finally broke down and did it.

I started out with two "tutorials" :

Both of these were lacking in information.  For example, there are no instructions on setting up the Google API, and there was a configuration option of "OIDCCryptoPassphrase" that was a variable and no one explained what it needed to be set to.  But, I wanted to get it done.

First, I went through Google.  I'd not set up google cloud for my domain before, so this was new.  First, log in to the https://console.cloud.google.com/apis/dashboard?pli=1 (it's the cloud platform).  Once in there, if you don't have a project already, create one.  This is done using the drop down at the top :

Click on "New Project" in the upper right hand corner :

Now, you can create a credential.  Click on "Credentials" on the left, and then "Create Credential" at the top :


Follow the set up guide.  The type will be what you need, in my case, I was doing Apache's HTTPd server, so I went with "Web Application".  The redirect URI setting must match what you use for your OAuth configuration (in the configuration file, actually).  Make sure you have your domains listed, etc.


At this point, copy the ID as well as the client secret.  These need to go into your configuration file for Apache's HTTPd.

You might need to create an "OAuth Consent Screen", too.  Those three configurations in Google are all you need.

Load up your editor you use to change the HTTPd configuration.  The basic lines you are going to need are :

    OIDCProviderMetadataURL https://accounts.google.com/.well-known/openid-configuration
    OIDCClientID CLIENT_ID_FROM_CONFIGURATION
    OIDCClientSecret CLIENT_SECRET_FROM_CONFIGURATION

    # OIDCRedirectURI is a vanity URL, and should not point to any actual content
    OIDCRedirectURI http://hostname.example.com/grafana/redirect_uri
    OIDCCryptoPassphrase PERSONALLY_CHOSEN_PASSPHRASE
    OIDCScope "openid email profile"
    OIDCRemoteUserClaim email

    <Location /grafana/>
        TemplateEnabled off
        AuthType openid-connect
        <RequireAny>
            # not just anyone signed in from google
            # Require valid-user

            # network
            Require ip 10.0.0.

            # signed in with domain
            Require claim hd:silverhawk.net

            # or, signed in with domain (e-mail fall through)
            Require claim "email~^(.*)@silverhawk.net$"

            # or Someone External
            Require claim "email~^username@gmail.com$"
        </RequireAny>

        ProxyPass http://localhost:3000/
        ProxyPassReverse http://localhost:3000/
        Order allow,deny
        Allow from all

        # grafana requires the username to be in a header
        RewriteEngine On
        RewriteRule .* - [E=PROXY_USER:%{LA-U:REMOTE_USER},NS]
        RequestHeader set X-WEBAUTH-USER "%{PROXY_USER}e"
    </Location>

The OIDCClientID and the OIDCClientSecret configuration items are where you stuff the respective items from your OAuth configuration we copied above.  The OIDCCryptoPassphrase is where I was getting lost - this is going to be something you choose, and is specific to the cluster (e.g. so that the cluster can keep state if you hit other servers).

I used a RequireAny to set up multiple options - so, if you are on the local network and sign in to google, you'll get in.  If your primary google address is a silverhawk.net domain, you can get in.  If your e-mail address is username@gmail.com, you can get in.

The rewrite directives are there specifically for Grafana so that Grafana can see the remote_user as the e-mail of the individual who just authenticated.  In your grafana.ini, locate your root_url, and make sure we've added the URI piece we are proxying, e.g. :

    root_url = %(protocol)s://%(domain)s:%(http_port)s/grafana/

Next, locate your "[users]" section, and set the following :

    allow_sign_up = false
    auto_assign_org = true

Next, locate the auth.proxy in your Grafana configuration.  Since we are rolling through HTTPd and it will be doing the authentication, we can let Grafana accept whatever HTTPd feeds to us.

    [auth.proxy]
    enabled = true
    header_name = X-WEBAUTH-USER
    header_property = username
    auto_sign_up = true

The header name should match what was in our rewrite rule, and the header property is the username that is going to get set up.  auto_sign_up needs to be set to true so that we can create accounts on the fly.

Now, restart any processes and give it a test!

Thursday, September 9, 2021

Spotting a Scam

 I received an e-mail (actually, the second one to a different address triggered this, but I'm hitting the first one).  Obviously, it's a scam.  Let's take a look :

First, an e-mail address takes the form of username@domain.  In this one, the "From" address doesn't match who they are pretending to be (they have pconfermations@gmail.com with a name of "Produts Confermations").  The @ portion (the domain) is "gmail.com".  No self-respecting business will send from a domain that is not owned by the business.  That would mean that McAfee e-mails would come from @mcafee.com, not @gmail.com .  The username doesn't even spell things right.  We know from the start that this isn't from McAfee, and whomever it is can't spell to save their life.

Second, the "subject" of the e-mail has awkward characters in it.  Beware of crap that has emoji's or other things in them - they are definitely unofficial.  Underscores in a subject are nearly unheard of with real businesses.

Next, into the body of the message, we find mis-spellings and bad grammar throughout.  More underscores in "Dear-Values-Customer"?  Yes, please.  "Antivirues"?  Okay, enough on that.  Let's just check and see if we can find the origin.  Open the message source (this will depend on your mail client, you might need to open a browser window and search the Internet for "view email source" and the name of your client to find out how).

At the top of an e-mail source are what can be referred to as "headers".  There will be no empty lines in this area.  These headers are keys and values, separated by a colon, the key on the left.  When an e-mail is received by a server, that server is supposed to tack onto the leading front any source information such as "Received".  This means that if we find each of the "Received" headers as we scroll down, we are actually taking a look at the messages history and going back in time.  We want to know the origin, so lets scroll to the bottom of the headers, and then work our way back to the top.

You'll see all of the "Subject:" and "Bcc:" headers - these are what your mail client displays when you open a message.  Shortly above this is our first "Received:" header.

Received: from mail-sor-f41.google.com (mail-sor-f41.google.com. [209.85.220.41])
        by mx.google.com with SMTPS id j5sor2873717lfe.26.2021.08.29.18.18.32
        for <email@gmail.com>
        (Google Transport Security);
        Sun, 29 Aug 2021 18:18:33 -0700 (PDT)

What I am interested in is anything that is four numbers separated by dots (no spaces, and not more than four numbers).  Here, that is "209.85.220.41", and it's called an IP Address.

When you are doing this, if the IP addresses start with 192.168., or 172.16., or 10.0, or 127., these are called "private networks" - though they can give us an idea of what the networks are built like, they won't help us, so if your first Received: header contains an address like that, simply move to the next one.

In our case, the IP address is not an internal, or private network.  So, open your web browser and do an Internet search for that.  (If you have Linux, you can also simply run a "whois 209.85.220.41" and get results).

Well, that sucks.  That address is a giggle address (spelling is intentional).  It's one of the gmail.com addresses.  I know, we could have looked at the domain name for it in the "Received" header, but I wanted to go through the exercise.  Google USED to show the source for the e-mail, even if it was done via gmail.com's website and not an e-mail client.  Just for kicks and giggles, scan all of them.

So, what CAN we do?  Actually, not much with this one.  Let's look at the second one.

Bugger.  It's also from a gmail account.  Still, the spelling of the name is atrocious, the spelling and use of symbols and underscores in the subject is a fast red-flag to know this is not official.  In the body, we have the usual grammar errors, and capitalization issues that alert us that the sender is not a standard english speaker.  Remember, a big business will have additional people proof-reading their e-mails and templates.

Then, there is the killer.  They couldn't even spell the company name right that they were trying too poof.  They had "MAcfee" instead of "McAfee".  Unfortunately, this one also had a gmail IP address :

Received: from mail-sor-f65.google.com (mail-sor-f65.google.com. [209.85.220.65])
        by mx.google.com with SMTPS id h7sor653174ljc.46.2021.09.09.03.18.39
        for <email@gmail.com>
        (Google Transport Security);
        Thu, 09 Sep 2021 03:18:39 -0700 (PDT)

So, like the detectives when all of the toilets were stolen from Scotland Yard, we have nothing to go on.

Still, on a positive note, they left two phone numbers.

1  (747) 600-1278 
+1 640-900-2247

If you Internet-search those numbers, you'll see that they have a scam reputation.  Still, I am tempted to call them just to see.