Crappy title. It is all accurate, it just doesn't end up where you think it does. I know, and I'm sorry for misleading you. I don't do click-bait very well.
Anyway, we're gathered here together today to celebrate the fact that I have a wood shop now. While it's true that it has to be mobile because my wood work is done on the back porch, I actually have all of the tools - drill presses, band saw (with re-sawing blades), belt sander, jointer (or joiner, if you prefer), mitre saw, table saw, and a planer.
I need to build a table for family. But, I absolutely have to know that what I have will do the job, and that requires a first quick-and-dirty project. What do I have available to use? Only 2x4's (the ones that are actually 1.5"x3.5") are available. So, I thought I should turn a 2x4 into a little folding stool.
I had a small gardening stool (or chair) I'd made in wood shop back in junior high school. The thickest piece of wood was 3/4" so I thought it would be an excellent project to make out of 2x4's. It would require re-sawing the boards to get close to the 3/4" thickness, a table saw to trim seat slats off of boards, a jointer to properly square the boards up, and a mitre saw for the chair feet. I grabbed it, and slapped together dimensions followed by a "cut list".
Looking at the list of stuff, I needed :- 3/4"x2"x15" (four of these) for legs
- 3/4"x3"x11" (two of these) for the seat frame
- 1/4"x1.5"x11" (7-10 of these) for seat slats
- 3/4" dowels
I first ran the 2x4's through the table saw. I needed two boards that were 3"x3/4"x11" (they are the sides of the actual seat). These are the widest of the parts, and I needed two of them.
While I was at it, I ran another section of the 2x4 through the table saw at the same position to rip another strip the same thickness off that came from the piece for the 3" one. On that board, I ripped it a second time, repeating the ripping while getting a little closer to 2" in dimensions for the chair legs. Each of those thin strips that came off was destined to become part of the seat slats.
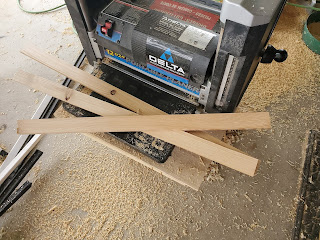
With the board widths close, I took the boards to the band saw and re-sawed the boards to about 7/8". This allowed me to generate even more material that could be planed down for seat slats. I finally had my boards close to dimensions (except for lengths on the legs). Here are the three sections of 2x4's and what they were trimmed to.
I ran them through the joiner to square them up (this isn't really necessary), but it gave me the dimensional lumber I was in need of - 2"x3/4" and 3"x3/4".
The next task is to mark out the other dimensions required (the lengths). I sliced them off at the miter saw starting with the seat slats, and moving to the seat frame. The legs needed a mitered cut at the bottom, so I did that, and then made sure all of the legs were the right length.
This little stool includes a curved frame. This is because I don't know anyone with a flat butt, so the frame ought to be the same.
Next up was a little seat frame marking, and leg marking. I need two holes in each leg (one for a pivot and one for an anchor), and two holes in the seat frame. I marked all of the locations according to the dimensions I'd checked from the original. I needed to put in some curves on the seat frames (because no one I know has a flat butt). In the middle, I marked in 3/4" from one side (the top side), and then set the board onto the table saw. Using string to get the radius (it was tied to the table saw fence), I moved the board until I could get close to the middle 3/4" mark and also the topside's corners, forming an arc.
With everything marked, it was off to the drill press to punch out the legs and seat frames. While there, I used a hole saw to make four small circles about 3/4" thick and 2" in diameter with a 3/4" bore. These are "retainers". I brought the parts back to the table saw, and used the jig saw to cut out the curve on the one seat frame.
Next, I grabbed a dowel, and used that to line up the two seat frames. Note that I had marked one hole on each of those seat frames about a 45 degree angle. This is to be cut out, and both of these seat frames needed that cut out on the same side. Then, I could draw the miserable attempt at a curved line onto the other seat frame so that the two frame tops can be parallel.
With the final cuts marked, I grabbed the jig saw again, and cut out both the arc on top of the other seat frame, plus notched those two holes. I now had my entire cut list complete, and I was ready for assembly.
The air compressor was fired up, and I grabbed the brad nailer and tacked it all together. Yes, there is no glue on this chair - don't let the picture above with the wood glue in the corner fool you. Some joints are not tacked, and some are. It allows anchoring at specific points and mobility at others.
And finally, compared to it's template (the one from junior high school) :
It looks like I am ready to try the next project, the table!


No comments:
Post a Comment